


The Simple & Easy Guide to Making Your Gratitude Tree
Write your gratitude in leaves.

Gratitude shows up in many forms. It's like a song that can be sung in diverse melodies and they're all beautiful. One of them is the Gratitude Tree.
I've written about the gratitude journal, gratitude jar, and gratitude exercises before and now it's time to learn about the adorable and fun tree of gratitude.
The gratitude tree, or thankful tree, is most popular as a Thanksgiving tradition where all guests write what they're for but it can be great for any event and even a daily activity.
What is a gratitude tree?
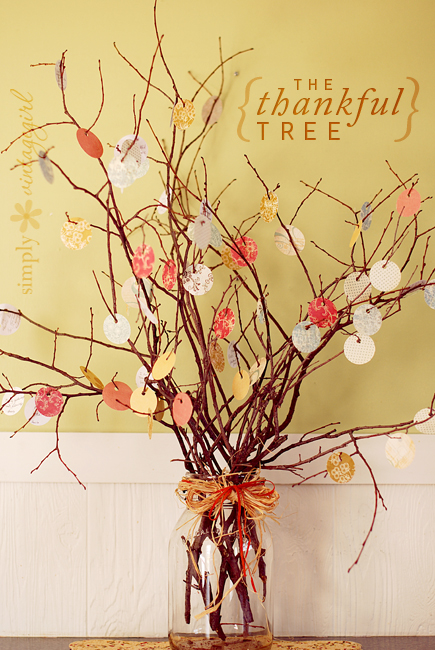
A gratitude tree is a symbolic representation of gratitude to which people can physically attach their gratitude notes. The tree serves as a beautiful example of how powerful gratitude can be.
Each gratitude note on the tree represents something that the person is grateful for, such as a good memory, a kind gesture, an achievement, or someone they love.
By adding these notes to the tree, we can visually and tangibly acknowledge and celebrate the blessings in our lives. The feeling we get when we read all the beautiful notes of gratitude is incomparable!
Make a Gratitude Tree
Let's now learn how we can easily make a gratitude tree now. It requires only a few basic supplies but creates an everlasting thing of beauty!
What you'll need
Here are the supplies you'll need for making a gratitude tree:
- A vase or vase-like container: Choose one that is large and durable enough to hold the tree branches
- Twigs or small tree branches: You can use a single branch that has many thin branches coming out of it or, you can use multiple thin branches.
- Thick craft paper of any color: If you want, you can make a color theme that matches your home or anything you have in mind.
- Scissors: To cut the paper into leaves.
- Hole punch: To make holes at the edges of the leaves so we can hang them on the branches. Alternatively, you can punch holes with a pencil or pen.
- Ribbon or thread: Use this to tie through the hole in the leaf so you can hang it on the branch. Be sure to use a thick thread, like jute.
- Pen or marker: To write the gratitude notes. Use a pen that doesn't spread its ink.
- Marbles or stones: Put these at the bottom of the vase to add more stability. This will make it easy for the branch to hold itself into the vase. If you're using a transparent vase, they'll add a nice touch!
How to make a gratitude tree
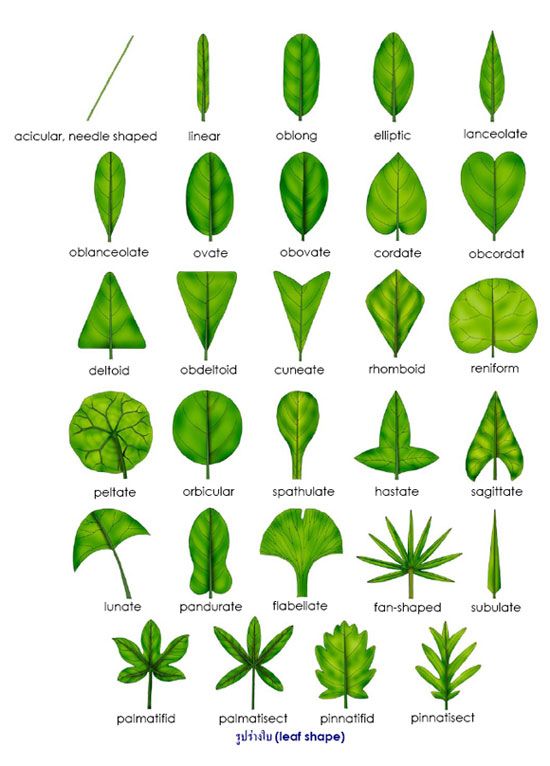
Step 1
Cut your craft paper into the shape of leaves. Here are a few leaf shapes to inspire you. The best shapes are those that have open space in the middle to write freely, Make sure you make the leaves big enough for writing. Cut enough so that they can be used for many days in the future.
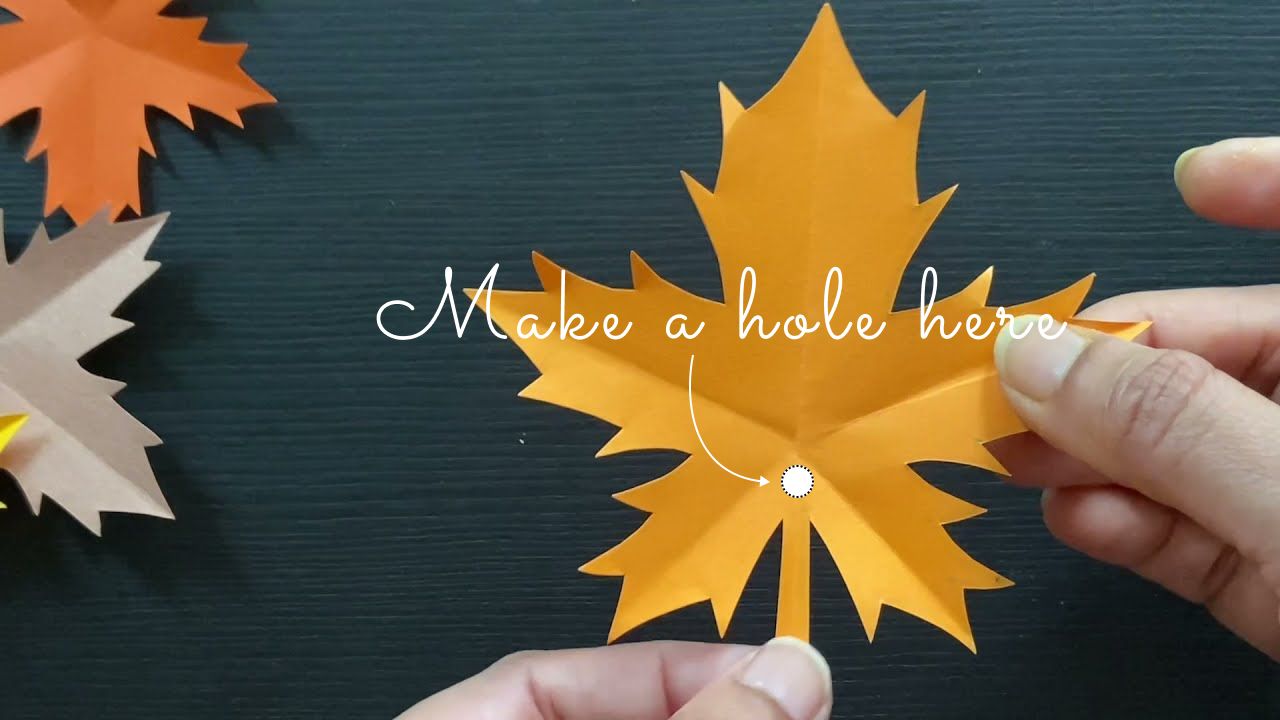
Step 2
Using a hole punch or pencil, make holes at the bottom of the leaf, a little above the edge where you want to tie the thread. Make the thread loop generous enough so that it can easily hand on the branch - 15 cm is a good length total to use for tying on the leaf.
Step 3
Add the rocks or marbles to the vase and adjust the branches into the crevices so that they are held there strongly.
Step 4
You can keep the leaves and pens there in front of the vase in case you're expecting guests and want to do the activity together. If not, you can have your family write their gratitude notes and start hanging them on the tree. Place the unused ones in front of the vase so that you can write on them regularly.
A great way to help your family and your guests to write their gratitude notes is to give them prompts. You can make write them on slips of paper and put them in a bowl. Here is a list of gratitude prompts that you can share with them:
- Write about a time when you laughed uncontrollably.
- Appreciate a friend who lives far away but is dear to you.
- What is the best gift that you have ever received?
- Write about a movie that touched your heart, and why.
- Write about someone that you really admire.
- Appreciate a refreshing walk that you had in nature.
- What do you like most about yourself?
- What do you love most about the time you are living in?
- Express gratitude for having as much food as you need.
- Appreciate the vehicles that let you travel long distances.
- Express gratitude for the facility of ordering food at your doorstep and the people who deliver it.
- Look around and list 5 things that help you in your day-to-day life.
- List 5 ways that having a mobile phone makes your life easier.
- Express gratitude for 5 things that you use daily.
- Write about an electronic device that you feel grateful to have.
You can find more prompts here.
And, that's it! I hope you and your family really enjoy making the gratitude tree and decorating it with your moments of gratitude. You can decorate the tree with fairy lights to make it shine more.
If you found this post interesting, do share it with your friends so they can have this wonderful experience too. Take care!
Continue Reading: How to Write a Thank You Note - Tips & Template

Free Weekly Gratitude Worksheet!
We respect your privacy. Unsubscribe at anytime.